How To Complete Your Profile On Thebenefactor.net: A Step-By-Step Guide

Published by TheBenefactor.net Editorial Team • Published June 24, 2026 • Updated June 29, 2026

How to Complete Your Profile on TheBenefactor.Net

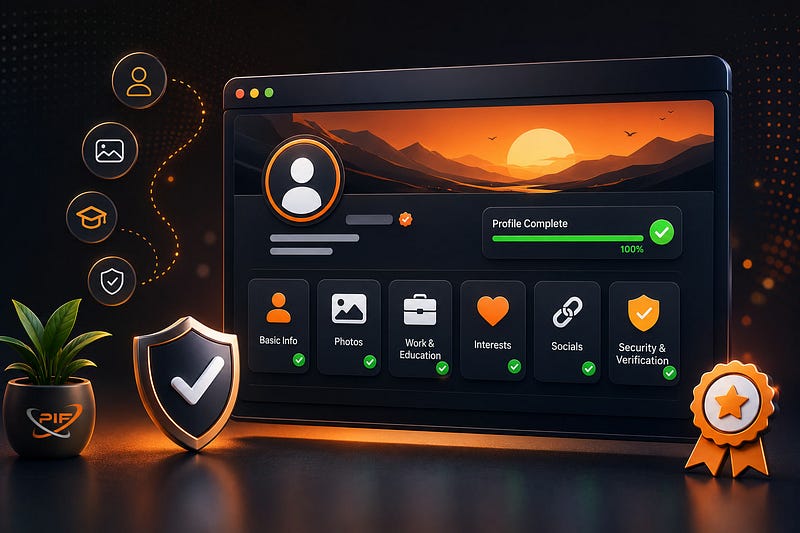
A complete profile helps you build trust, connect with other members, and unlock the full experience on TheBenefactor.net.

Whether you’re here to share ideas, earn rewards, grow your network, or participate in communities, a fully completed profile makes you more discoverable and credible.

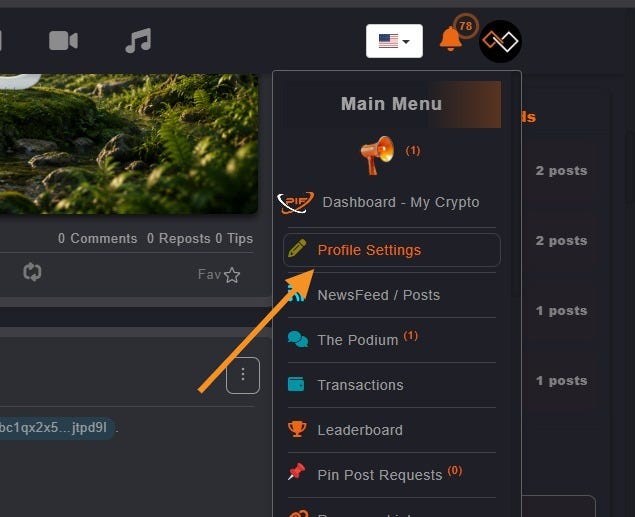
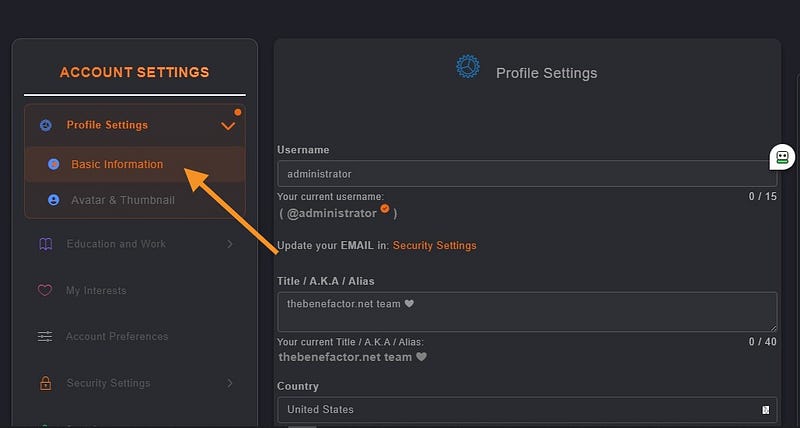
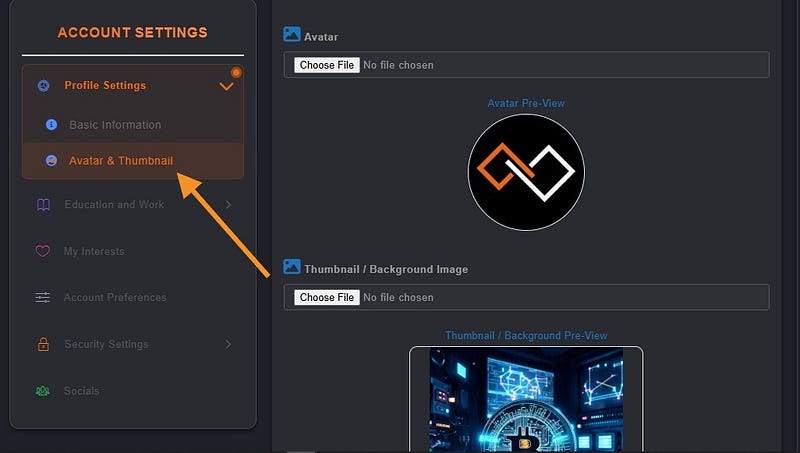
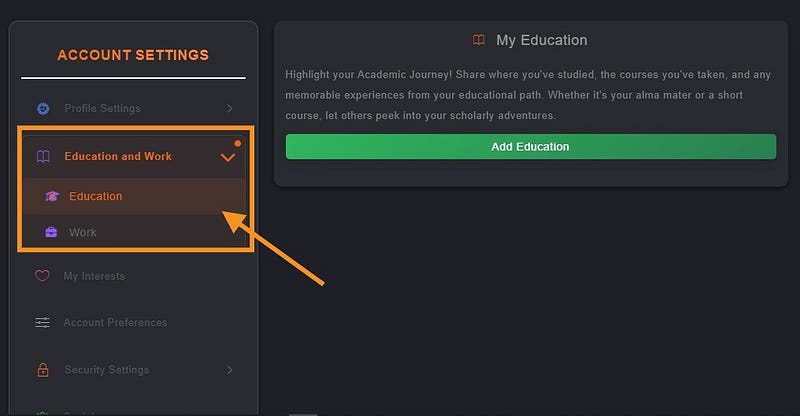
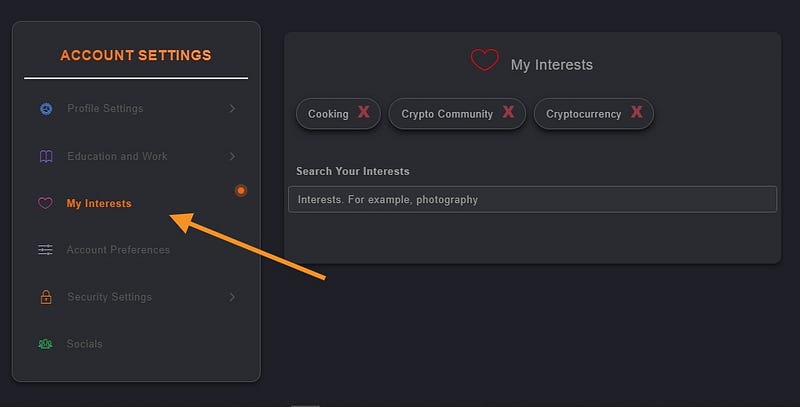
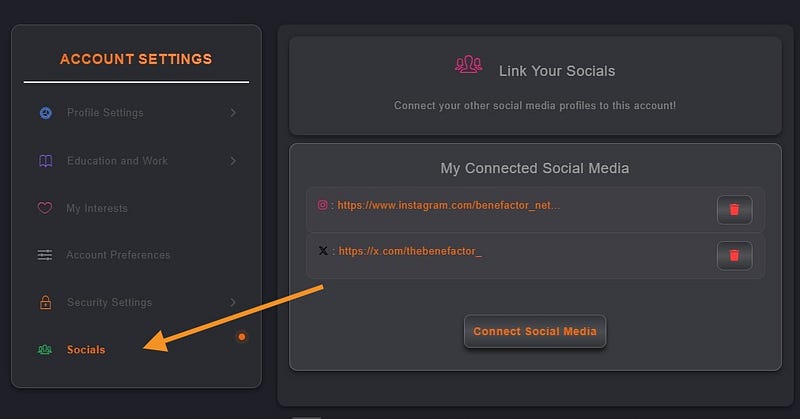
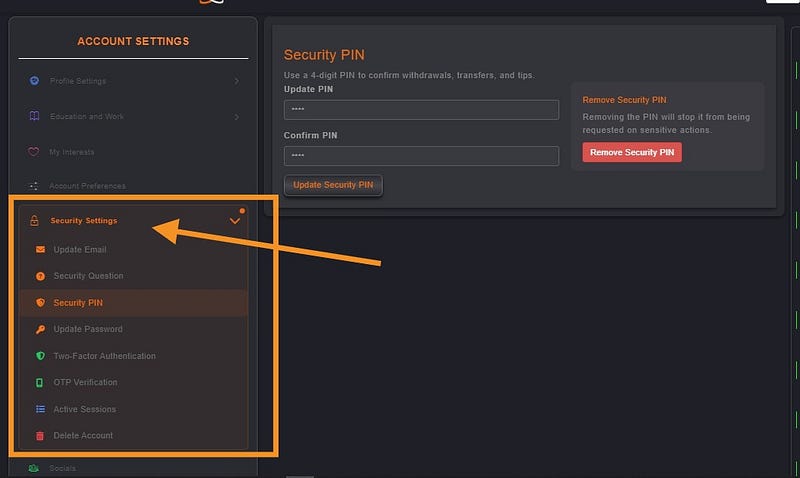
In this guide, we’ll walk you through every step to achieve a 100% complete profile.


Why Completing Your Profile Matters 🌟

Users with complete profiles are more likely to:

✅ Build trust with other members

✅ Receive more engagement on their posts

✅ Get better content and community recommendations

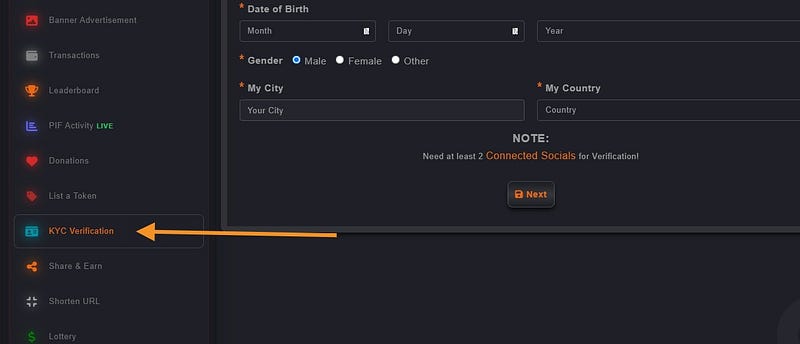
✅ Unlock verification opportunities

✅ Earn rewards through security and verification tasks

Let’s get started!


Step 1: Open Your Profile Settings ⚙️

Open Your Profile Settings

The journey begins in your account settings.

How to access Profile Settings:

  1. Log in to your account.
  2. Click your profile picture or username.
  3. Open the Profile Settings dashboard.
  4. Use the Account Settings menu on the left side (or top menu on mobile).

From here, you’ll be able to customize every aspect of your profile.


Step 2: Complete Your Basic Information 📝

 Complete Your Basic Information

Your basic information helps others learn who you are.

Navigate to:

Profile Settings → Basic Information

Username

Choose a unique username (up to 15 characters).

Title / Alias

Add an optional title or nickname.

Examples:

  • CryptoEnthusiast
  • BlockchainResearcher
  • CommunityBuilder
  • TechLead

Location

Select your:

  • Country
  • State / Province
  • City

This helps users connect with people from their region.

About Me

Write a compelling bio (up to 2,500 characters).

Tell people:

  • Who you are
  • What you’re interested in
  • What you do
  • Why you’re on TheBenefactor.net

💡 Pro Tip: Mention other users by typing @username to create profile links directly inside your bio.


Step 3: Add Your Avatar & Cover Image 🖼️

Add Your Avatar & Cover Image

People remember faces before usernames.

Navigate to:

Profile Settings → Avatar & Thumbnail

Avatar

Upload a clear profile photo using:

  • JPG
  • PNG
  • WebP

Your avatar appears beside your posts, comments, and profile.

Thumbnail (Cover Photo)

Upload a banner image that represents your personality, brand, project, or interests.

A great cover image instantly makes your profile stand out.


Step 4: Showcase Your Education & Work Experience 

Showcase Your Education & Work Experience 

Help others understand your background and expertise.

Work Experience

Add:

  • Company Name
  • Position / Designation
  • Employment Dates
  • Description of Your Role

Education

Add:

  • School, College, or University
  • Years Attended
  • Relevant Details

Whether you’re a student, entrepreneur, developer, creator, or professional, sharing your experience adds credibility to your profile.


Step 5: Add Your Interests ❤️

Add Your Interests

Personalize your experience by telling us what matters to you.

Navigate to:

Profile Settings → My Interests

What You Can Do

  • Search for interests by keyword
  • Add up to 25 interests
  • Update them anytime

Your interests help The Benefactor recommend:

  • Relevant content
  • Communities
  • Users to follow
  • Discussions you may enjoy

The more accurate your interests, the better your experience becomes.


Step 6: Connect Your Social Profiles 🔗

Connect Your Social Profiles

Let people find you across the web.

Navigate to:

Profile Settings → Socials

You can connect accounts such as:

  • X (Twitter)
  • Facebook
  • Instagram
  • LinkedIn
  • And more

Adding social links increases trust and makes networking easier.


Step 7: Secure & Verify Your Account 🛡️

Secure & Verify Your Account 

Security isn’t just important, it’s rewarding.

Visit:

Profile Settings → Security Settings

Completing security tasks helps protect your account while also earning rewards through the Task Center.

Verify Your Email 📧

Profile Settings → Security Settings → Update Email

Confirm ownership of your email address.

Create a Security PIN 🔐

Profile Settings → Security Settings → Security PIN

Protect sensitive actions such as wallet-related activities.

Enable Email OTP ✉️

Profile Settings → Security Settings → OTP Verification

Receive one-time passwords for additional protection.

Enable Two-Factor Authentication (2FA) 📱

Profile Settings → Security Settings → Two-Factor Authentication

Add another layer of security to your account.

This is highly recommended for all users.


Get Verified with KYC Verification ✔️

Get Verified with KYC Verification

Want a verified badge and additional rewards?

Complete KYC verification.

My-DashboardKYC Verification

Level 1 Verification

Provide:

  • Full Legal Name
  • Date of Birth
  • Gender

Level 2 Verification

Upload:

  • Government-issued ID (Front & Back)
  • Clear Selfie Photo

Verification helps create a safer and more trusted community for everyone.


Earn Rewards for Security Tasks 🎁

Did you know that improving your account security can earn you rewards?

After completing eligible security actions, visit the Task Center and check the Security Tasks section.

You may receive rewards for:

  • Email Verification
  • Security PIN Setup
  • OTP Activation
  • 2FA Activation
  • KYC Verification

Protect your account and get rewarded at the same time.


Final Step: Save Your Changes ✅

Don’t forget to save your progress.

Whenever you update information, click:

Update Changes or Save

This ensures your profile information is stored correctly.


You’re All Set! 🎉

Congratulations!

Your profile is now complete and ready to make a great first impression on TheBenefactor.net.

A complete profile helps you build credibility, connect with like-minded people, unlock rewards, and enjoy everything the platform has to offer.

Take a few minutes today to complete your profile — and start getting the most from your experience on TheBenefactor.net.


Related Articles

How To Deposit Pif Tokens

Depositing PIF tokens into your TheBenefactor.Net account is quick, secure, and designed for both beginners and...

How Donation Campaigns Work On Thebenefactor.net

  Helping others should be simple, transparent, and trustworthy. That’s why TheBenefactor.Net inclu...

How The Pif Lottery Works: A Complete Guide

  If you’re wondering how the PIF Lottery works, you’ve come to the right place. The PIF...

How Security Rewards Work: Get Rewarded For Protecting Your Account

  In today’s digital world, account security is more important than ever. Every day, cybercriminals...

Need more help?

Didn't find what you were looking for? We're here to assist.

Contact Us or use our Live Chat